Ever since I was a kid, I've wanted to have my own R2-D2. Well, maybe not
an exact duplicate, but certainly one of the "R" series of Astromech droids.
I've always been fascinated by robots, having played with Transformer toys
as a child, and moving on to computers as I grew up. In my teens, I was
curious about how one could get into robotics as a hobby, but didn't see
a way to get started. How does one machine parts and design circuits if one
doesn't know where to start or own any tools?
In 2007 I discovered the "r2 builders" club, devoted to building astromech
replicas based on the Star Wars films. They've had time to solve many of the
problems and work out standardized sizes and patterns for building these droids.
But why an R2? Why not create something new and different? Well, like many Star Wars
fans, R2-D2 is sort of a special case. He was an endearing character, helpful and
ever loyal, emotionally expressive despite being a metal can that could only speak in
beeps and whistles. For being a small utility robot, R2 had a lot of personality,
and yet seemed remarkably believable.
So my goal is to build an R2 droid that is a reasonable approximation of what you
see in the films. Not R2-D2, just a random R2 that you might see in a background
shot. I'm not aiming for complete authenticity, as I also want this to be
personalized to my liking... and heck, I'll probably cut corners along the way. :)
I'm tempted to put a big sign across his back that says "Deus Ex Machina"
as a stab at how much R2D2 was used as a plot device to get the protagonists out
of intractable situations. He can be a plot device on wheels. :)
Updates follow below in reverse-chronological order.
November 9, 2015
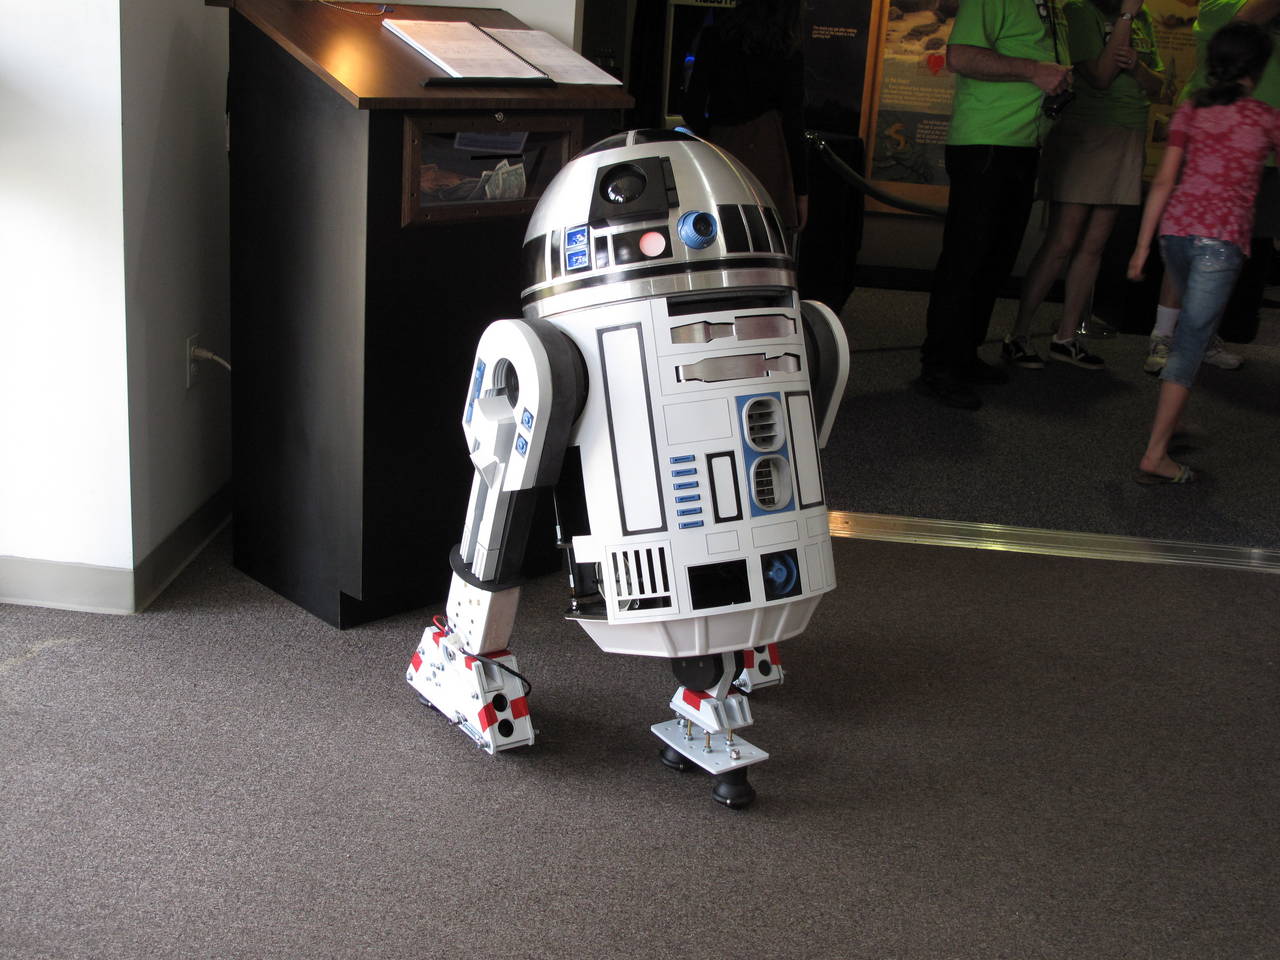
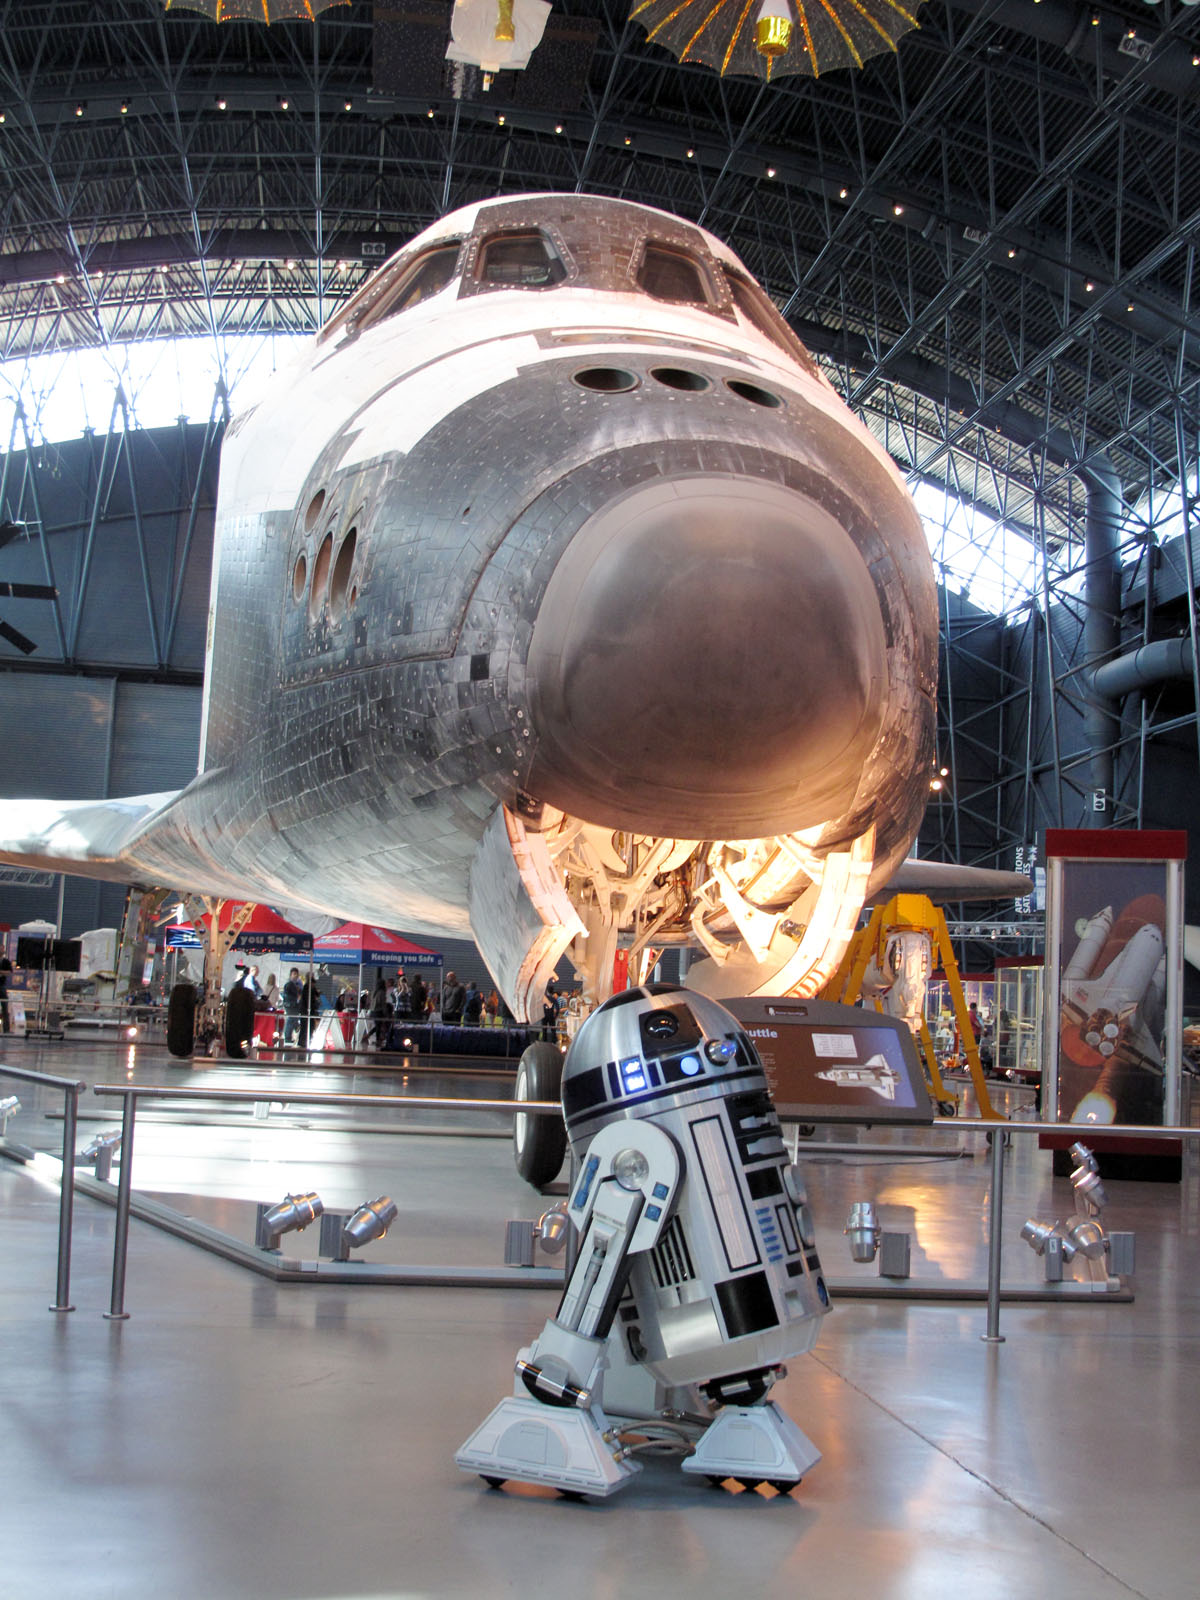
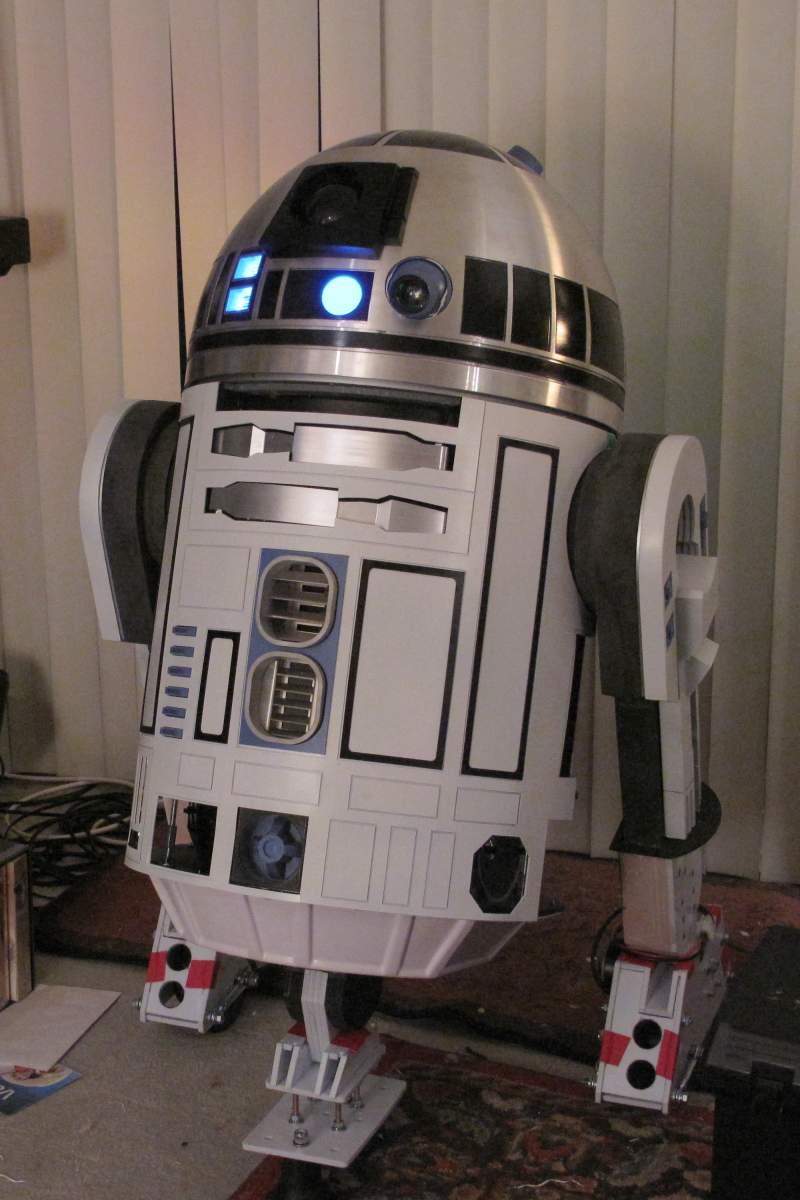
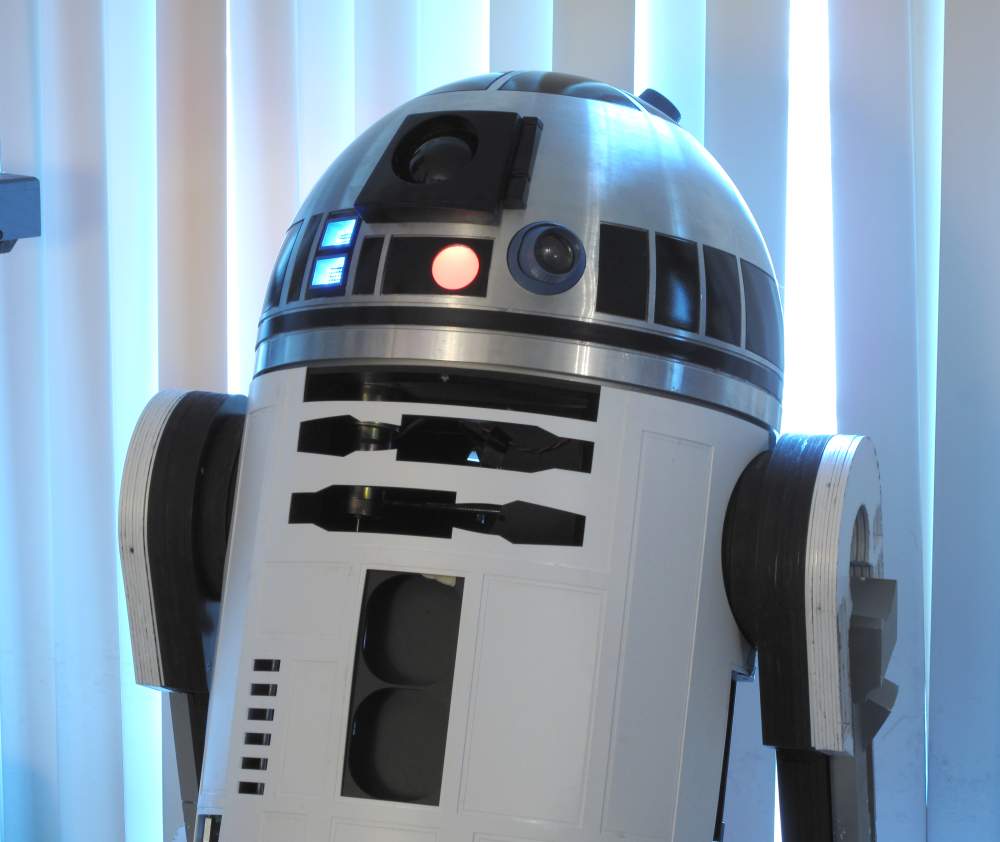
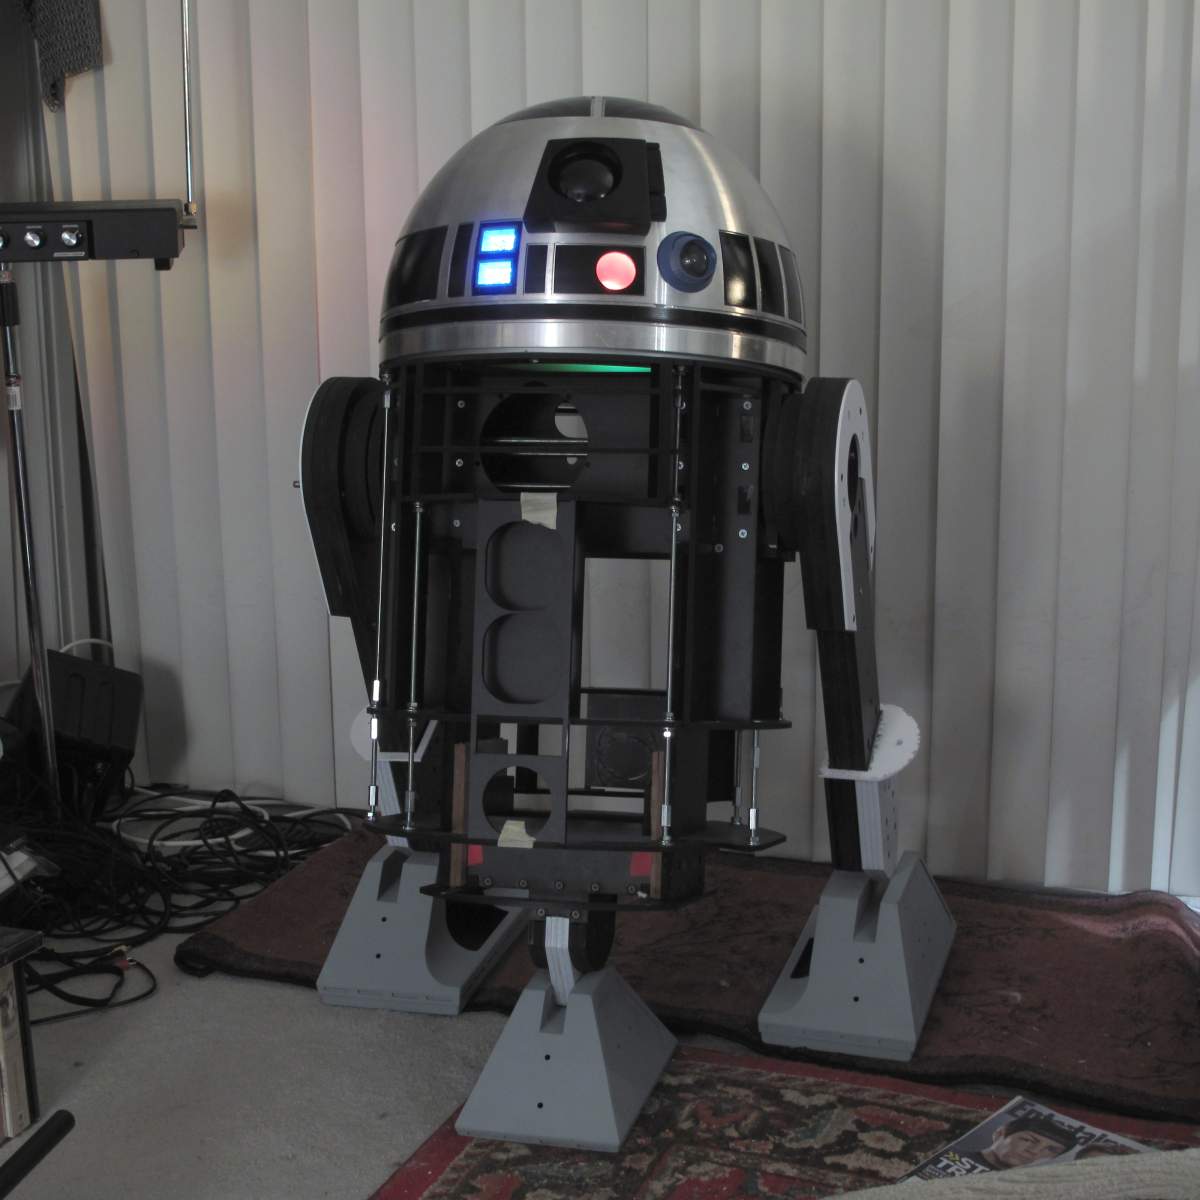
I haven't updated here in a while, because not a lot changed for a few years. However, in 2014 I did a lot of the remaining work that was needed on the legs, and in 2015 I also managed to close up some of the holes in his back and add a a magnet attachment system for the rear skin. Lately the Air-&-Scare has been the impetus to get some work done, so both of those "annual" updates happened in October. This year marks the point where R2 no longer has any gaping holes, and is effectively "complete", even if he's never actually "finished". There are some minor details left to add, and some improvements to make in other areas, but nothing is obviously missing anymore.
This year we had some great events. The "Air & Scare" at the Udvar Hazy Air & Space Museum was a success (picture below), and I was also able to grab some video again at the Shore Leave convention.
We had a great time at Shore Leave 34, in August 2012 (this past week, as of this writing). Unfortunately, R2 took some damage while sitting in storage, so I had to spend some time doing some really quick repairs before this event. No other work was done in the intervening year since Shore Leave 33, since he's been sitting in storage to make room for my wife, who I married soon after the convention last year.
I also managed to do some more damage to him during the con. You'll notice in the below video that he's missing one of his ankle cylinders. I managed to bump a wall and knock it off before filming.
February 22, 2012
We're back from SheVaCon in Roanoke VA. We had a good weekend, even though only two droids showed up this time. I captured some video with my iPhone:
One of these days I'll get around to actually finishing him. What's left to do isn't overly complex, but it'll be time consuming. The main thing is that I need to take his feet apart and re-glue everything in them. Then I can finally finish painting the legs and feet. That will then allow me to attach some of the last detail pieces, like the foot hoses, battery box harness details, foot strips, ankle cylinders (which are temporarily stuck on for the moment), and leg struts.
I need to take the back skin off so I can do some of the frame adjustments that will let me install the power coupler and octagonal ports on the back.
I also need to finally add a large data port, make a new charging port for the head, and move the body charging ports to a more convenient location.
But other than those things, he's mostly done. :)
July 12, 2010
I found more video of me/R2 at last year's Shore Leave (2009):
July 12, 2010
I forgot to post this video back in October, so I'm posting it now. I only captured a small amount of video while there was room and time to do so. The kids tend to swarm the droids even more than the video shows, so normally they can't move much and you can't film very well. Often, we just leave them behind the tables because it's almost impossible to do anything with them, and the kids get extremely grabby.
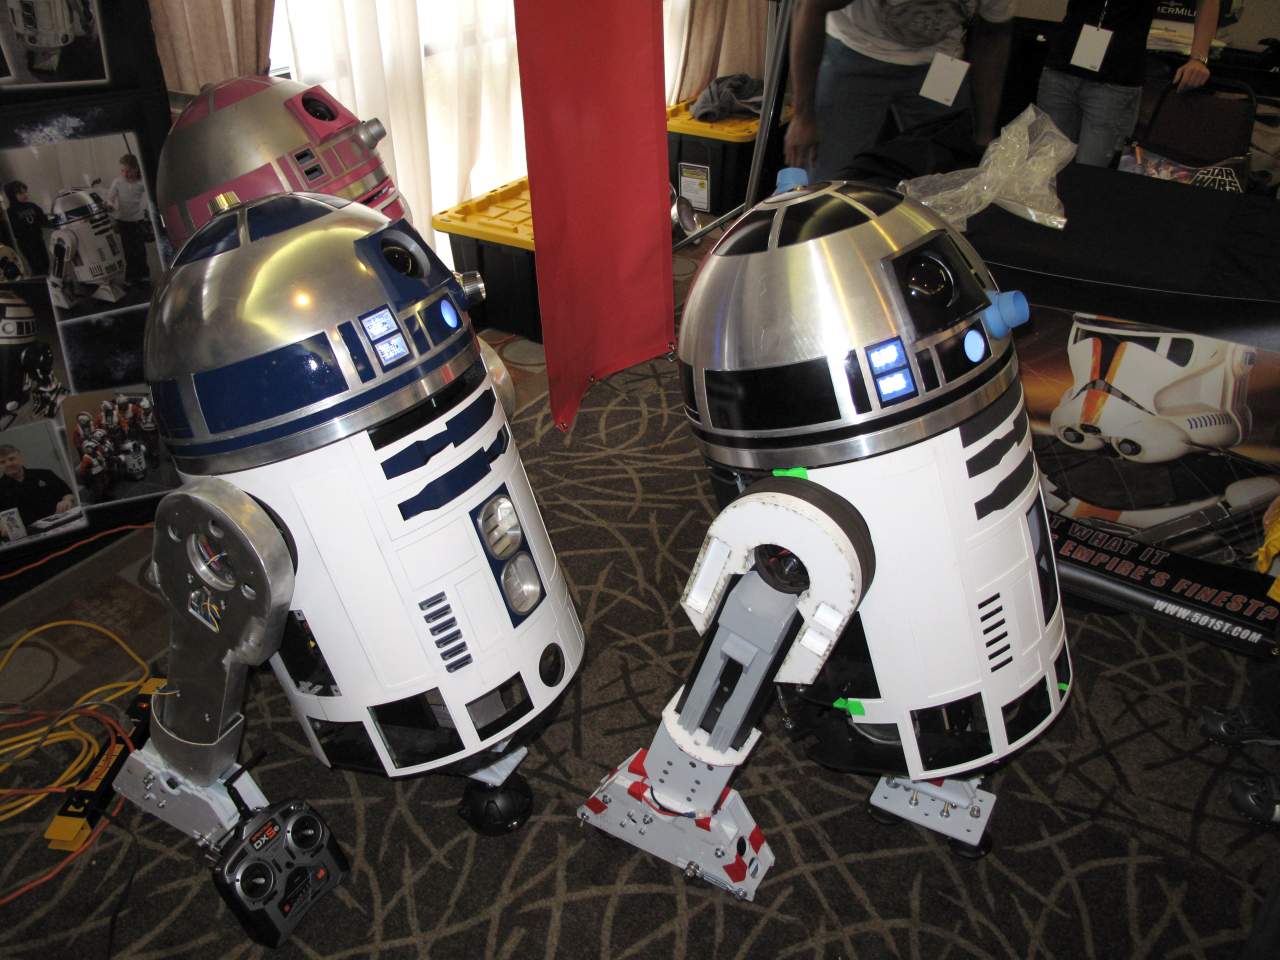
R2 also just attended Shore Leave 32 this past weekend, and I captured some video of him driving around and talking, towards the end of the event when I was able to do so without being cornered for questions and photo-ops (though don't get me wrong, that's most of the fun!)
You can see a huge difference between the two videos, now that R2 has his aluminum skins, foot shells, etc.
January 26, 2010
Made some pretty good progress at our droid building day at Andy's this past weekend. Over the last few months, I've worked here and there on the legs and feet, which I have assembled and started painting. They need a lot of work still, but some I can put off and just get it thrown together for now. The new skins need a good attachment method, but they are nearly visually complete. I have some rewiring to do, more detail pieces to add, etc... but finally, there's a light at the end of the tunnel, and it's not an on-coming Star Destroyer.
July 14, 2009
Other people's videos of my droid from Shore Leave:
July 13, 2009
R2 went to Shore Leave!
July 8, 2009
Slow but steady progress continues. This week I'm getting the foot shells structurally complete. These are the A&A plastic feet, since I decided to not use the steel JAG feet. I have yet to do anything about battery-boxes for the feet, or the hoses. Still need ankle wedges+cylinders, half-moons, etc.
April 25, 2009
March 7, 2009
The skins are off for painting. I'll be this way for a while, since I can now start installing detail pieces that need to sit inside or behind the skins.
February 28, 2009
R2T0 and I went to Shevacon! Here's a few of pictures.
More can be seen in the photo gallery.
February 26, 2009
I have the skins temporarily attached, but without the panels glued back together and not
painted. I also have the booster covers and horseshoes assembled, but they too need a lot
of finishing and painting.
I've also re-worked the electronics a bit. I started having a problem with the droid
going haywire if it had been sitting out in the car and then started up while still
quite cold.
February 17, 2009
R2's first steps!! I brought my camera along for droid-building night, and
started recording within moments of getting him on the floor on his own
wheels.
February 16, 2009
Making an R2 and have your own CFsound III?
Download my CF3 sound files,
and just unzip it into an empty CF card, and it's ready to go with a 12-channel remote.
February 13, 2009
February 3, 2009
January 31, 2009
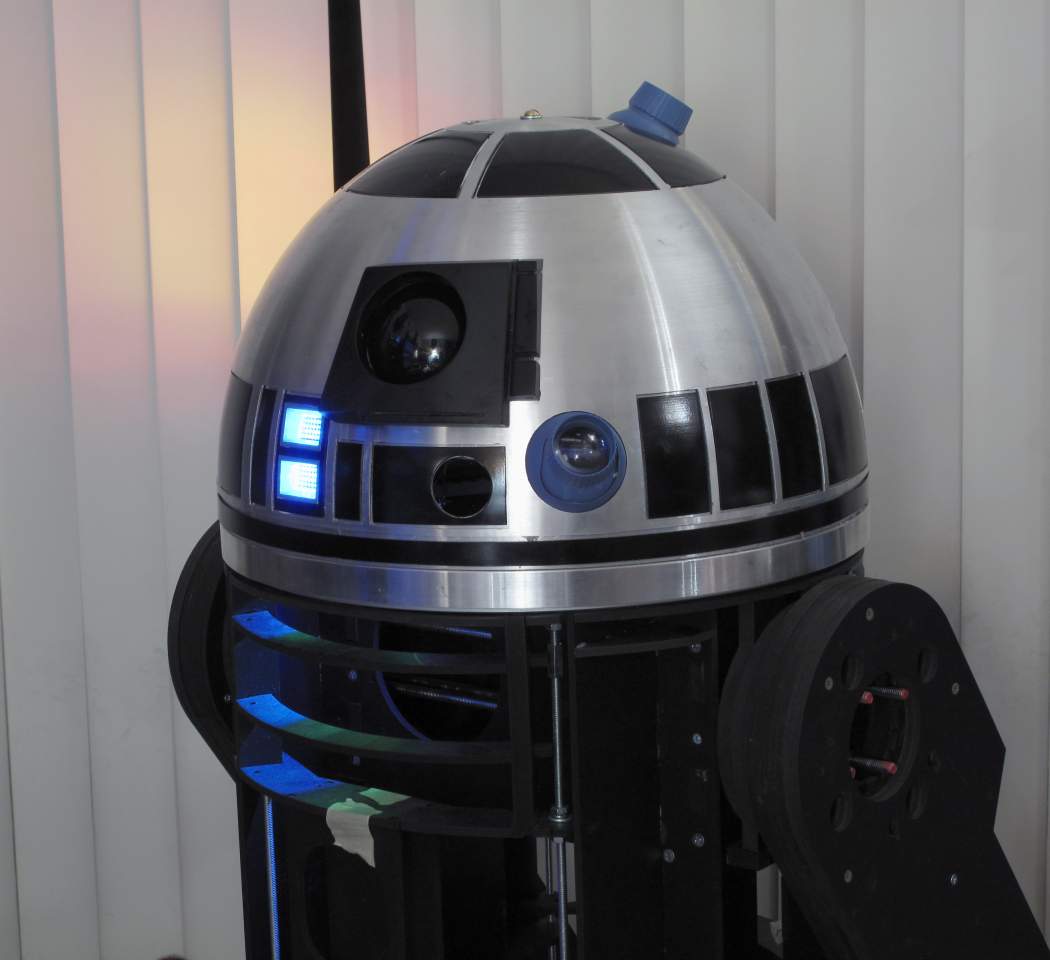
Temporary PSI lens in place. Also connected the front HP, though they only light
up during boot-up. I still need to rig up some longer cables to connect the rear PSI and HP.
Also re-mounted some of the internal electronics boards, and rigged up an external
power switch for the head so I don't have to reach in and mess with the battery. :)
January 30, 2009
Started installing the electronics. Still need to figure out the PSI
lens thing, and hook up the other two HPs (though they only light up
during the boot-up for some reason).
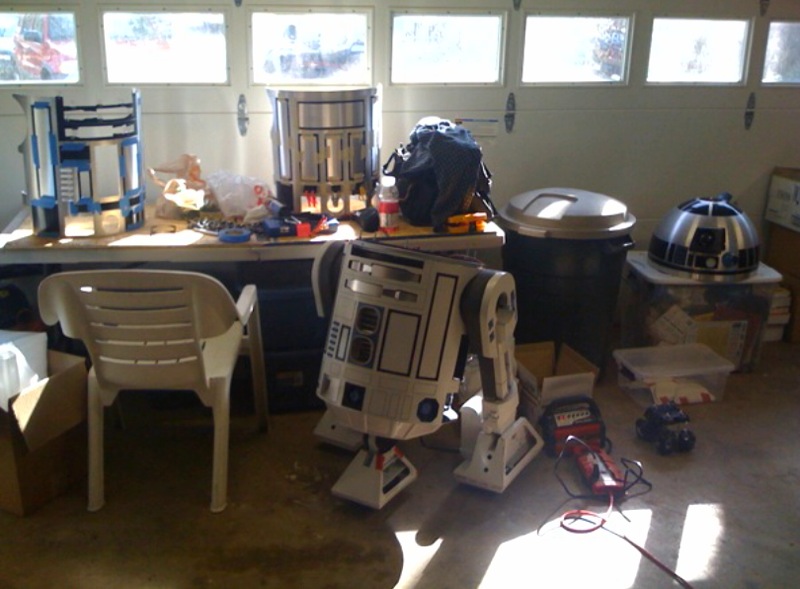
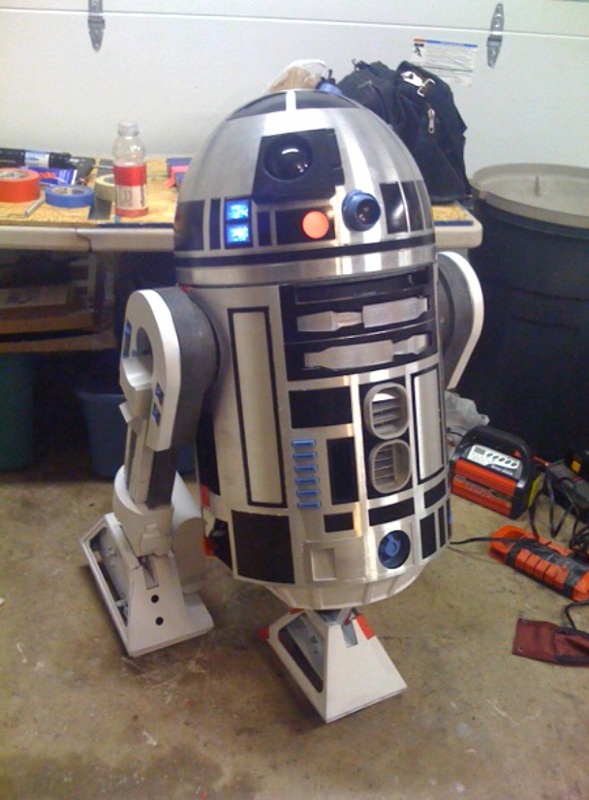
January 29, 2009
This week's progress... I took December off from working on the droid at all, but have
resumed in January. I've finally made some progress on additional leg assembly,
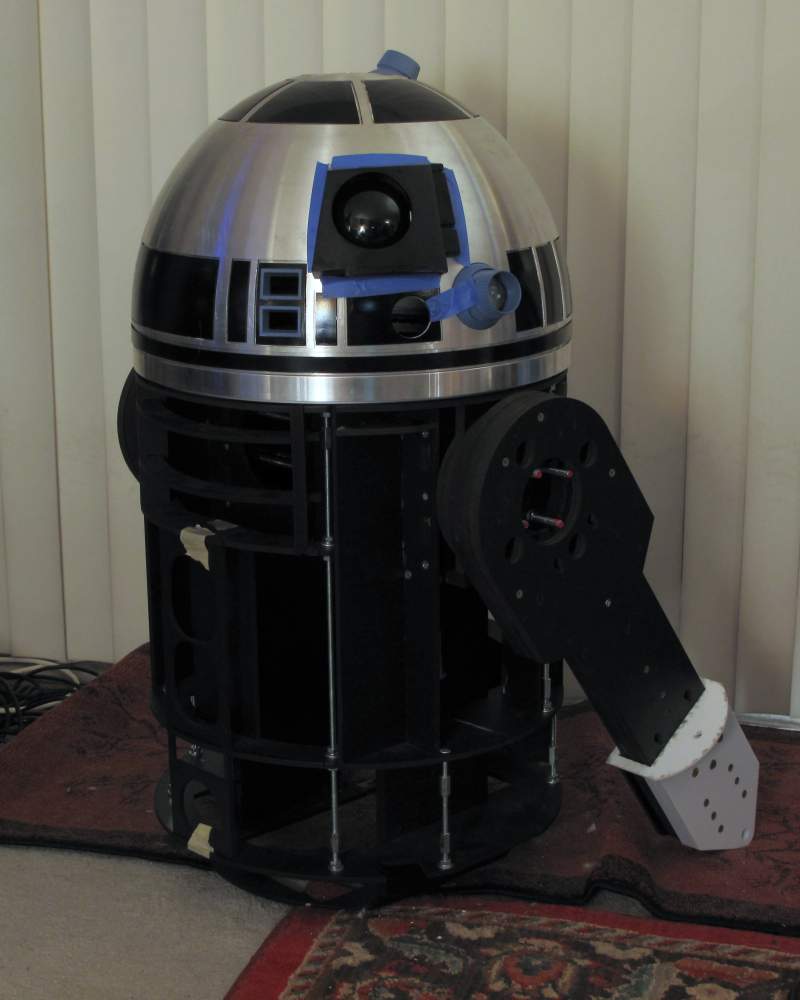
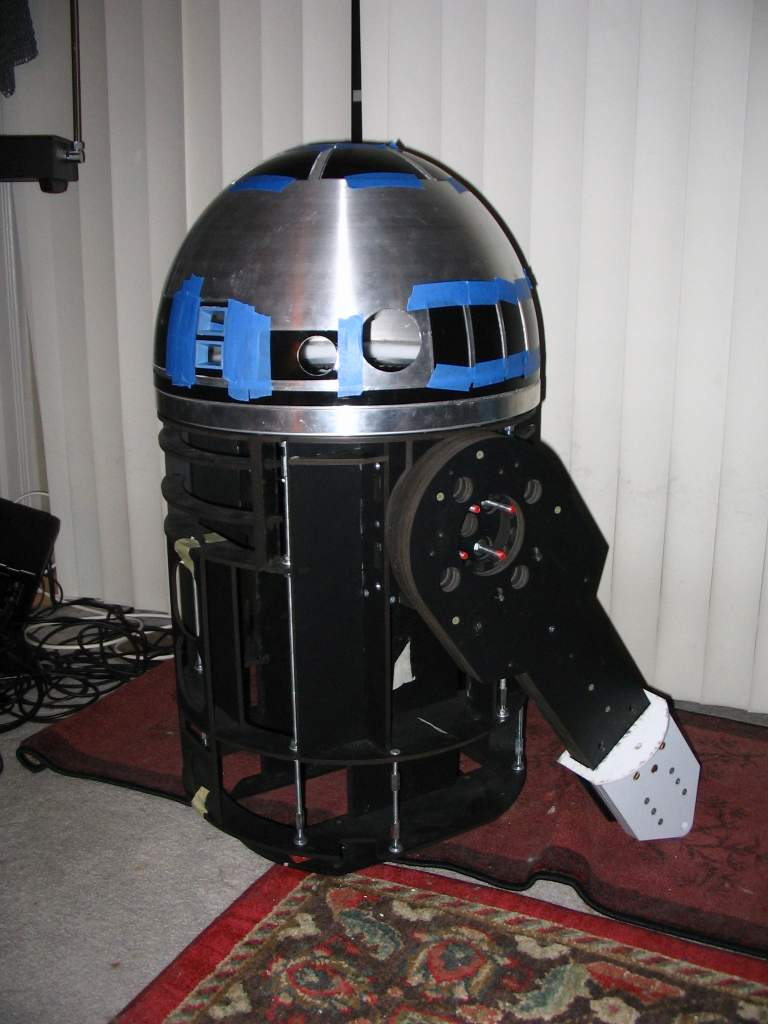
and have made enormous progress on the head. The shots below all have tape
holding various parts while glue dries.
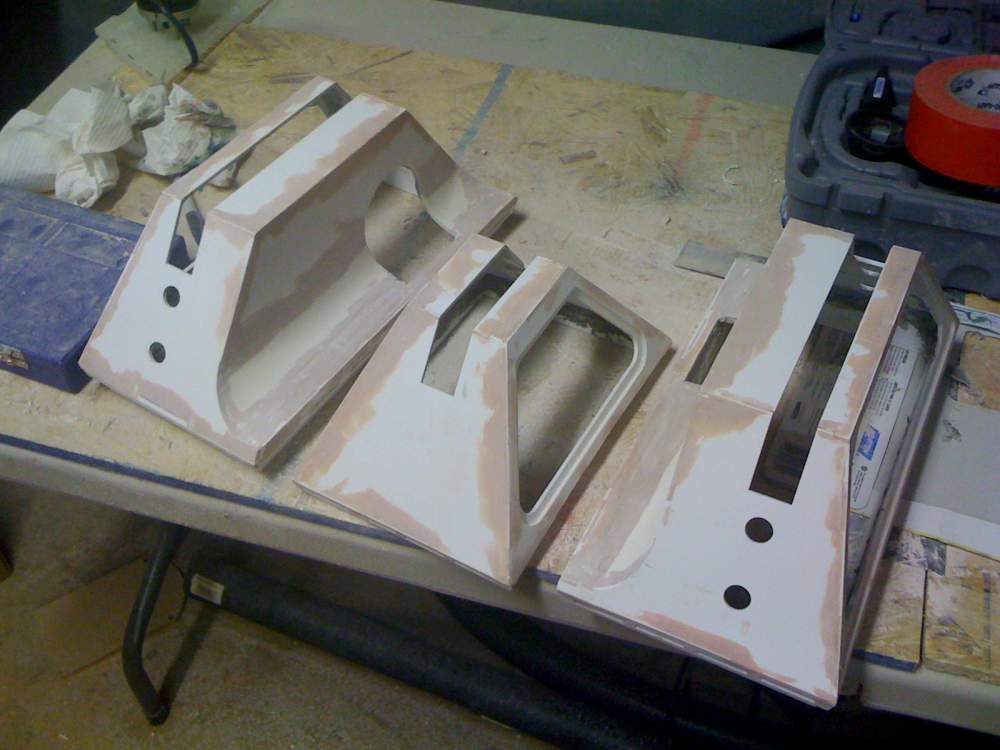
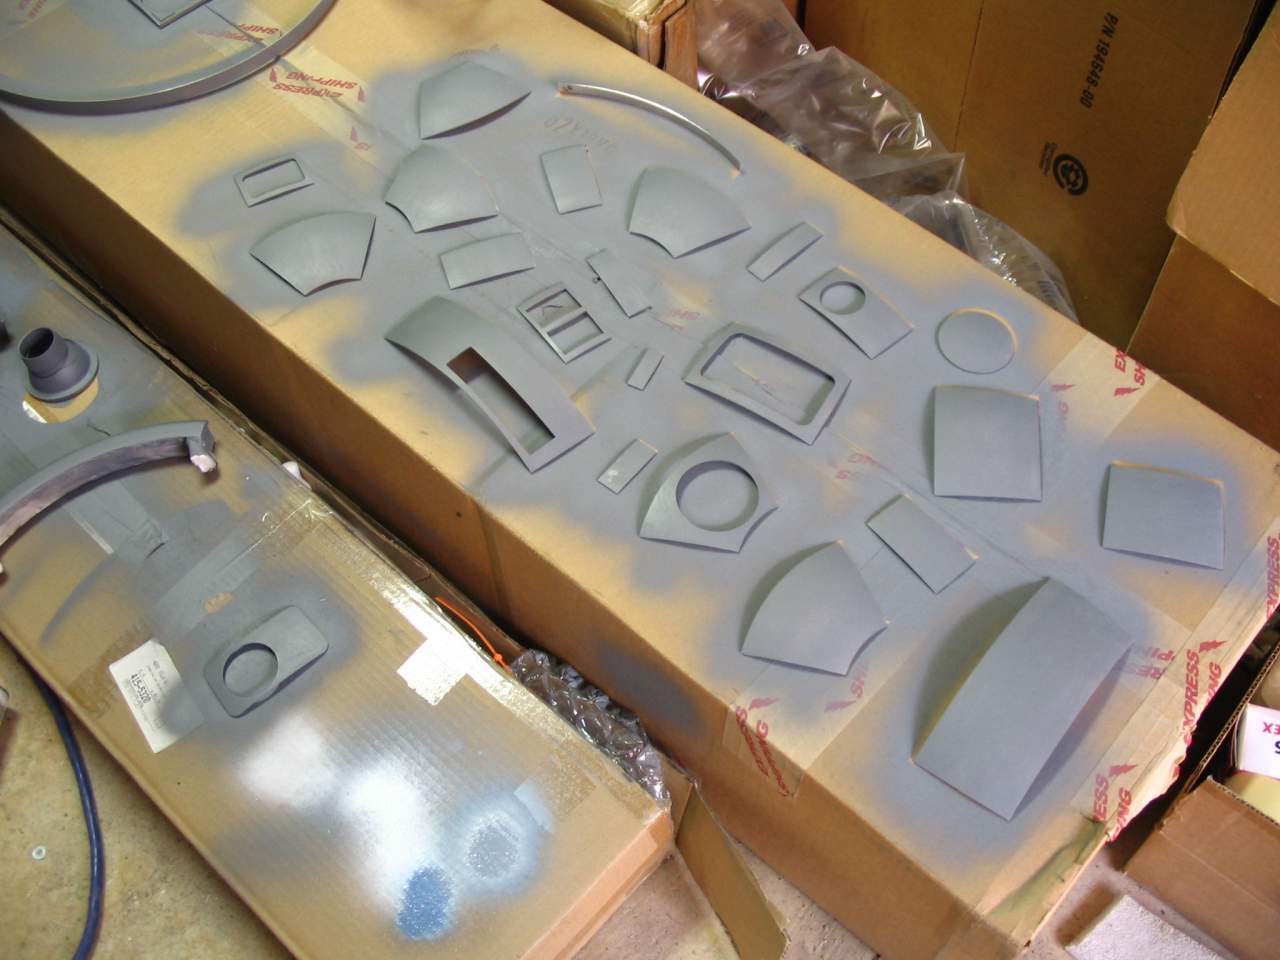
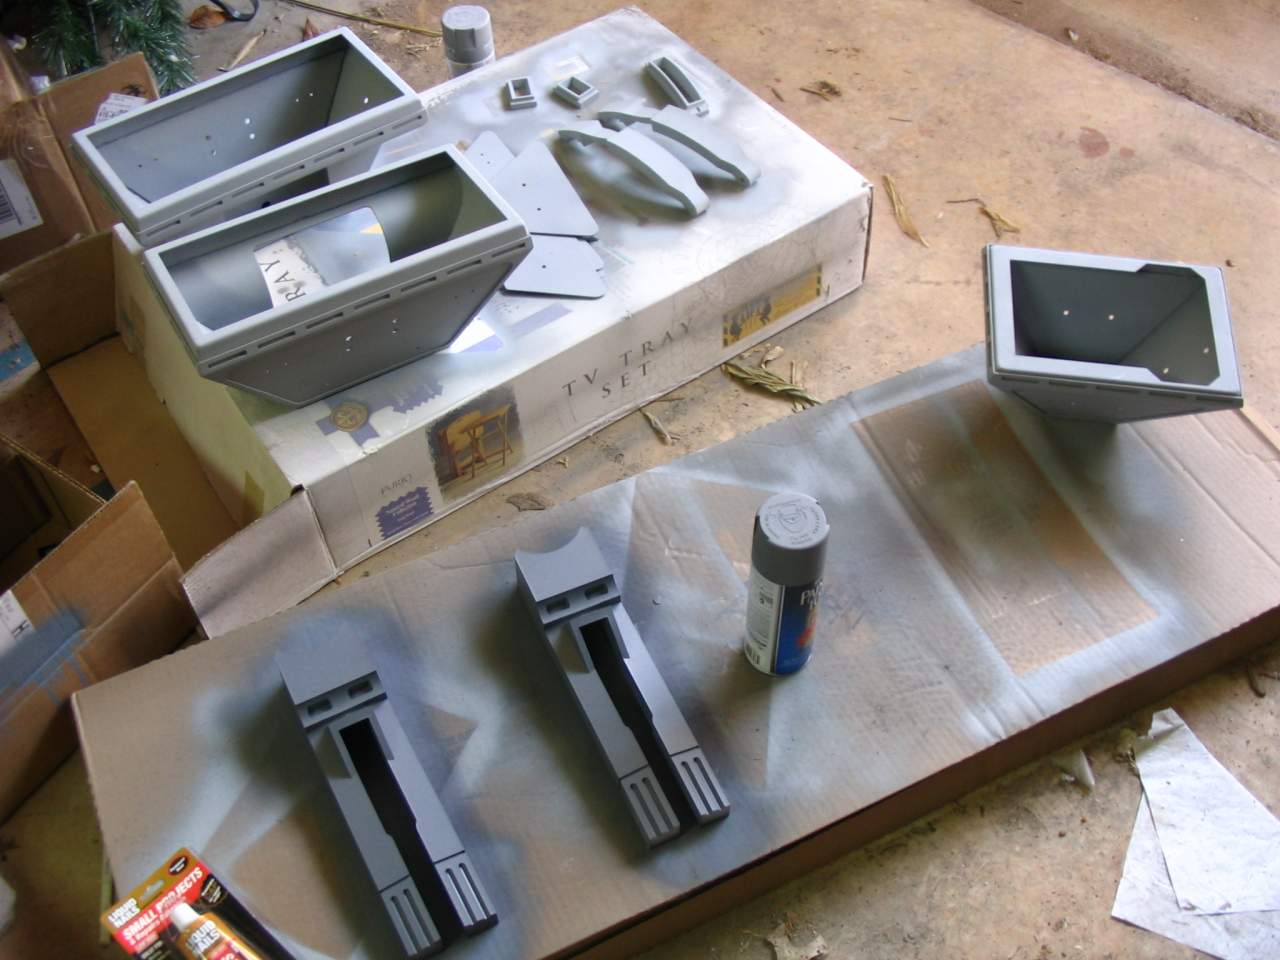
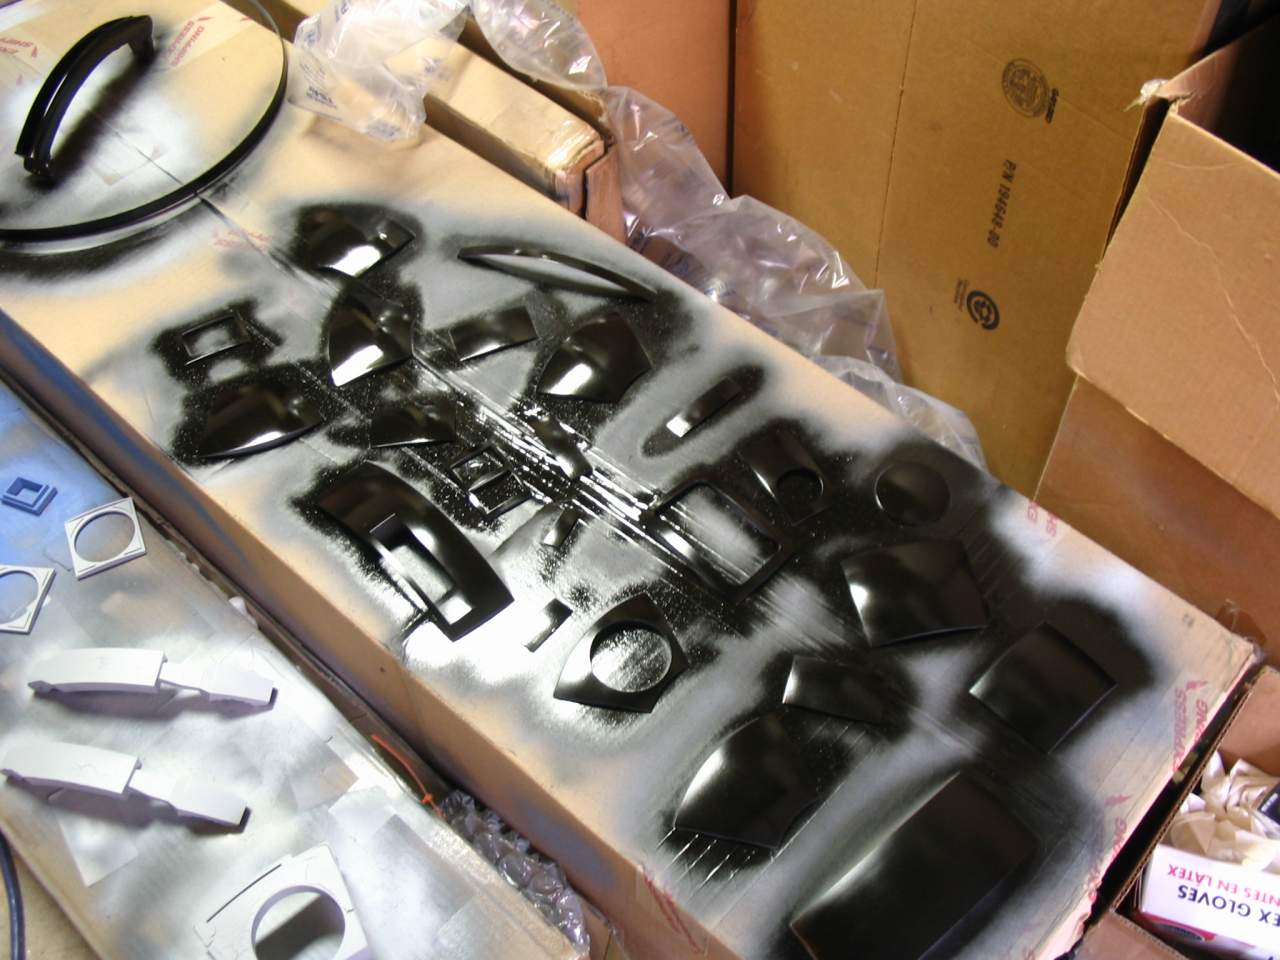
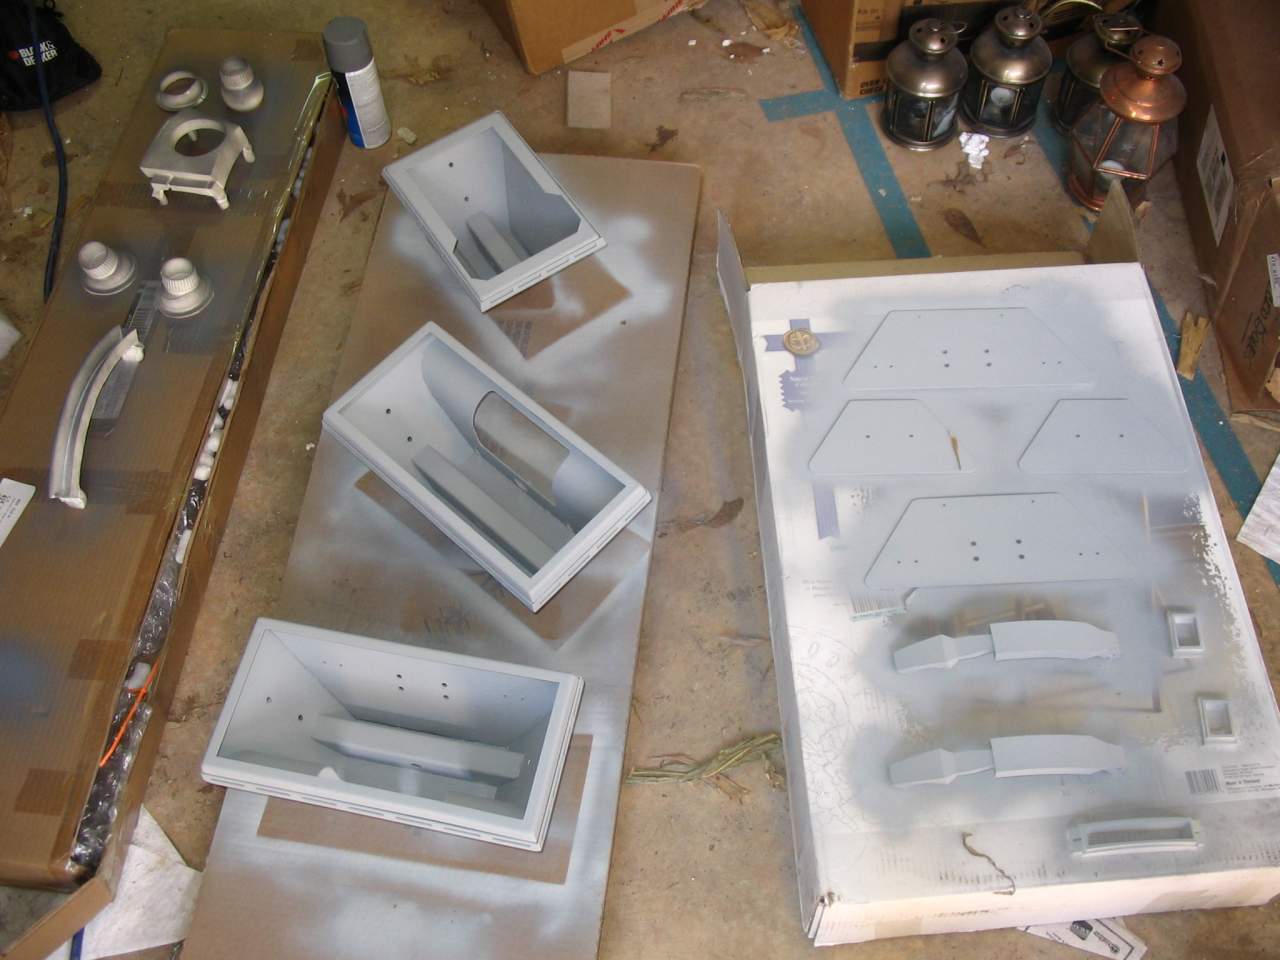
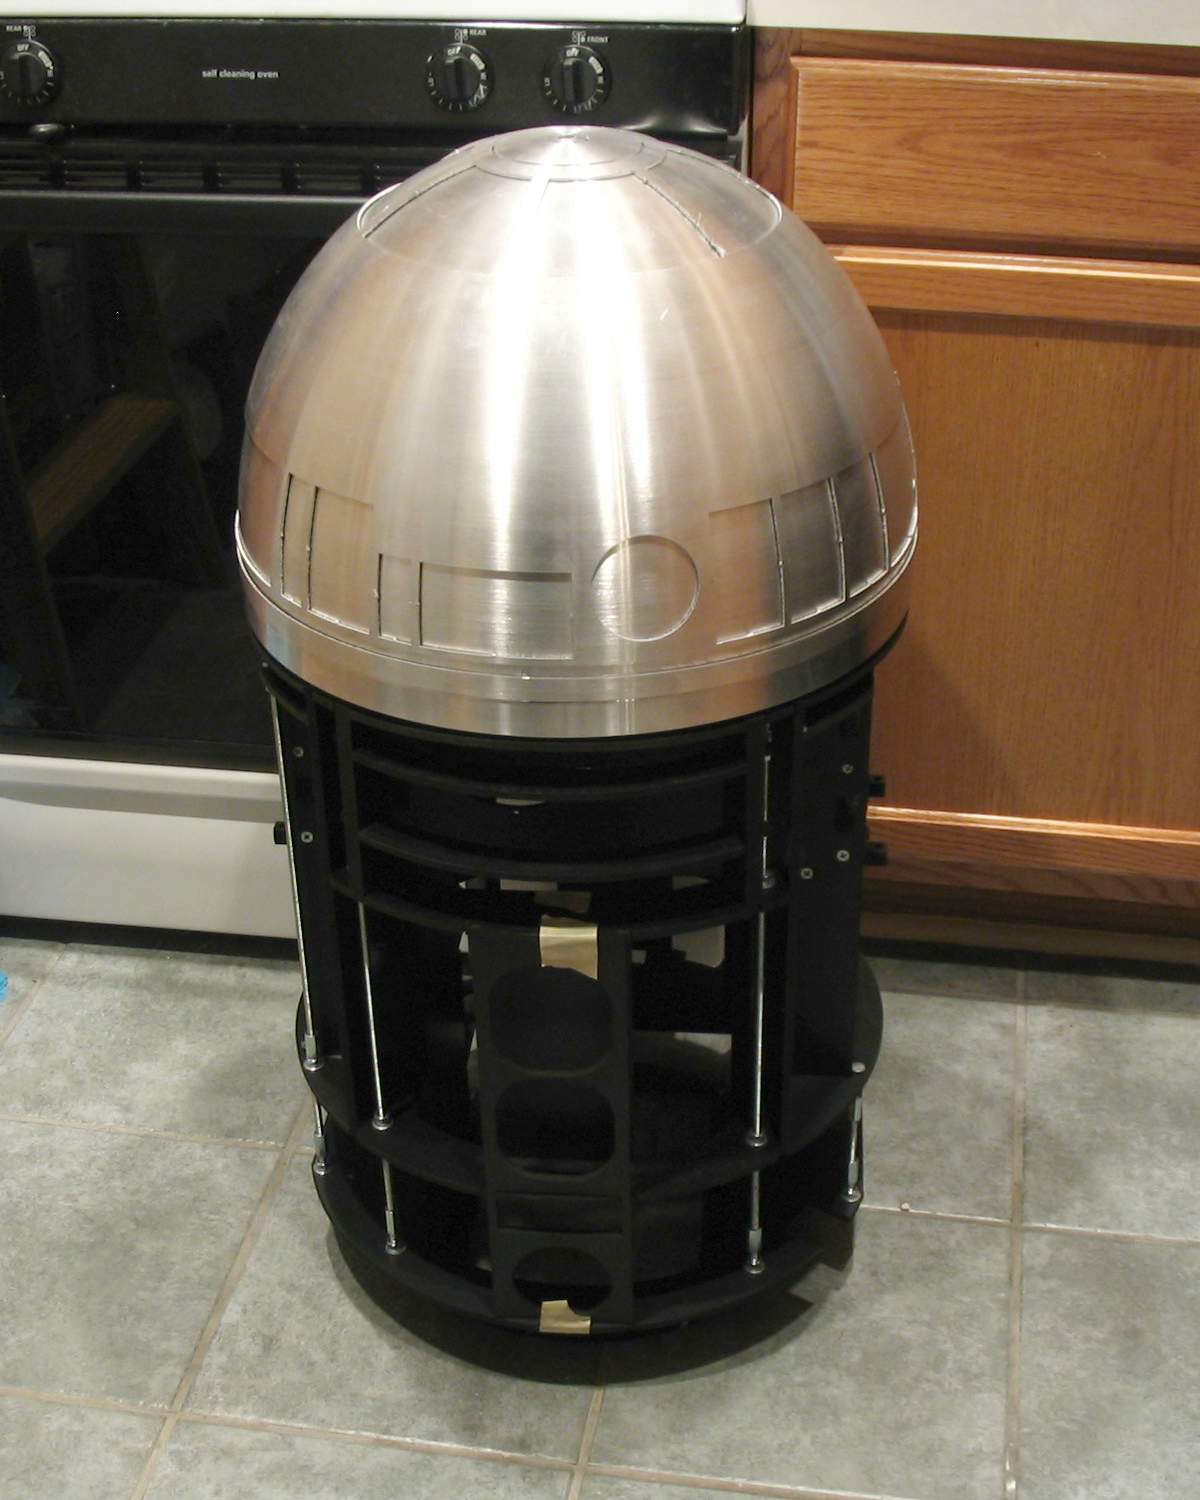
October 5, 2008
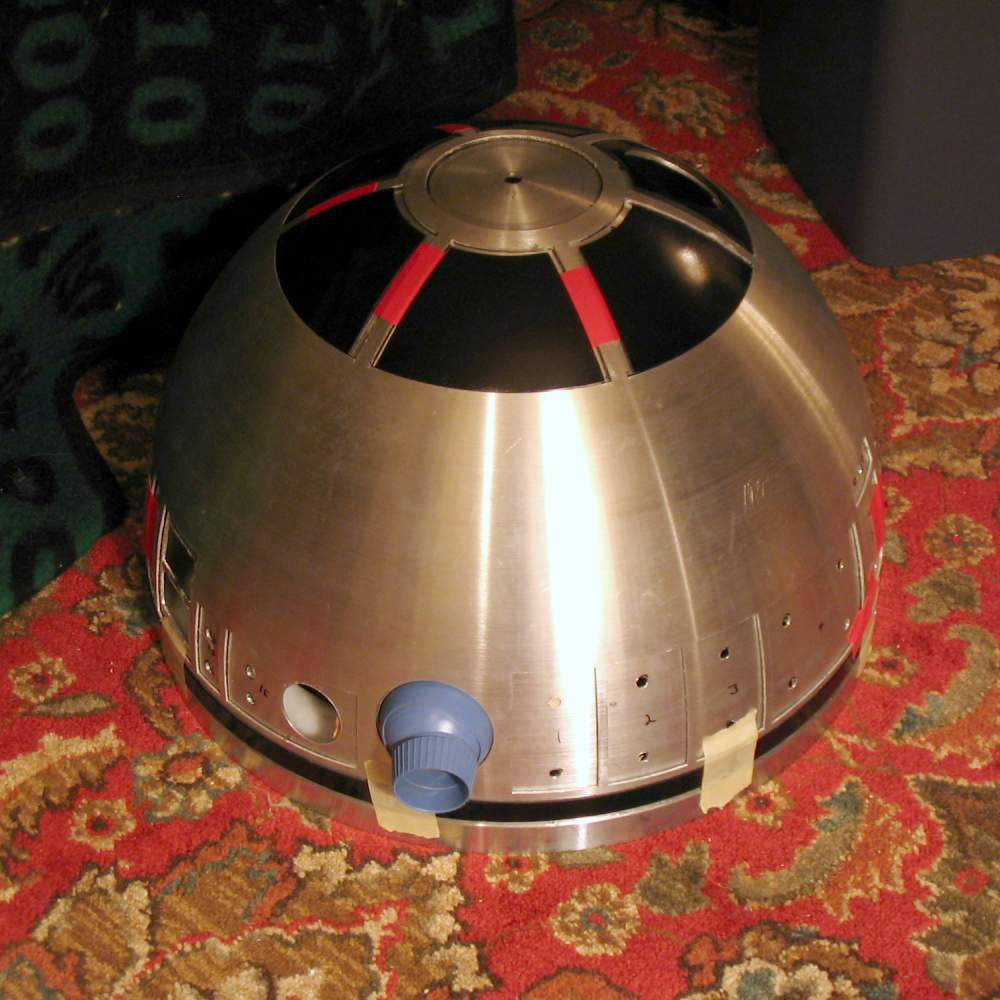
Priming and painting parts for the domes and legs! I've made a lot
of progress in cutting and sanding the aluminum dome parts. The
head is gradually coming together.
August 16, 2008
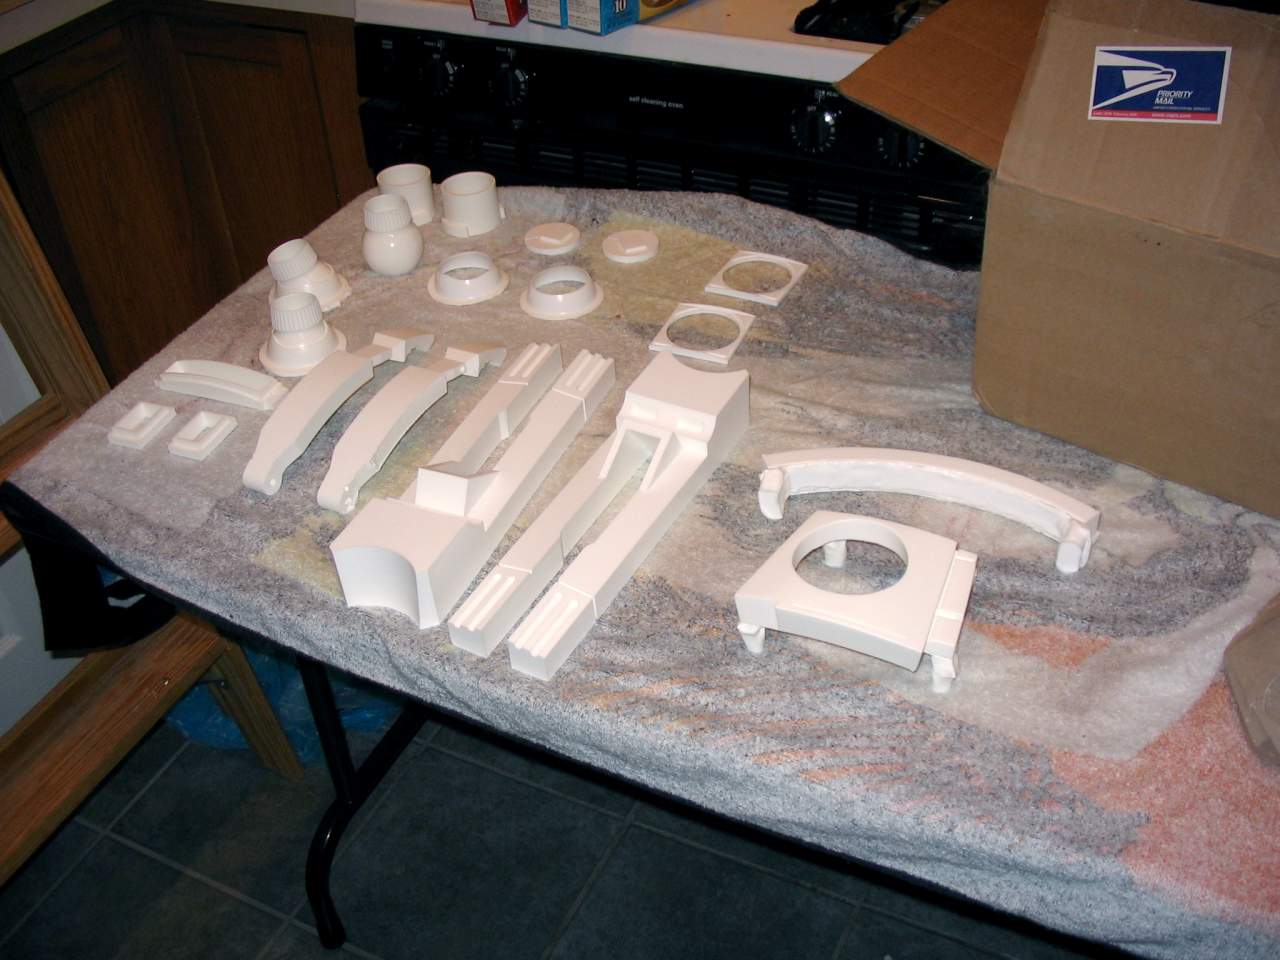
I finally had some time to clean the mold release off of some of the
resin parts (the ones with more immediate need), and started priming
a few of them, as well as the steel foot shells.
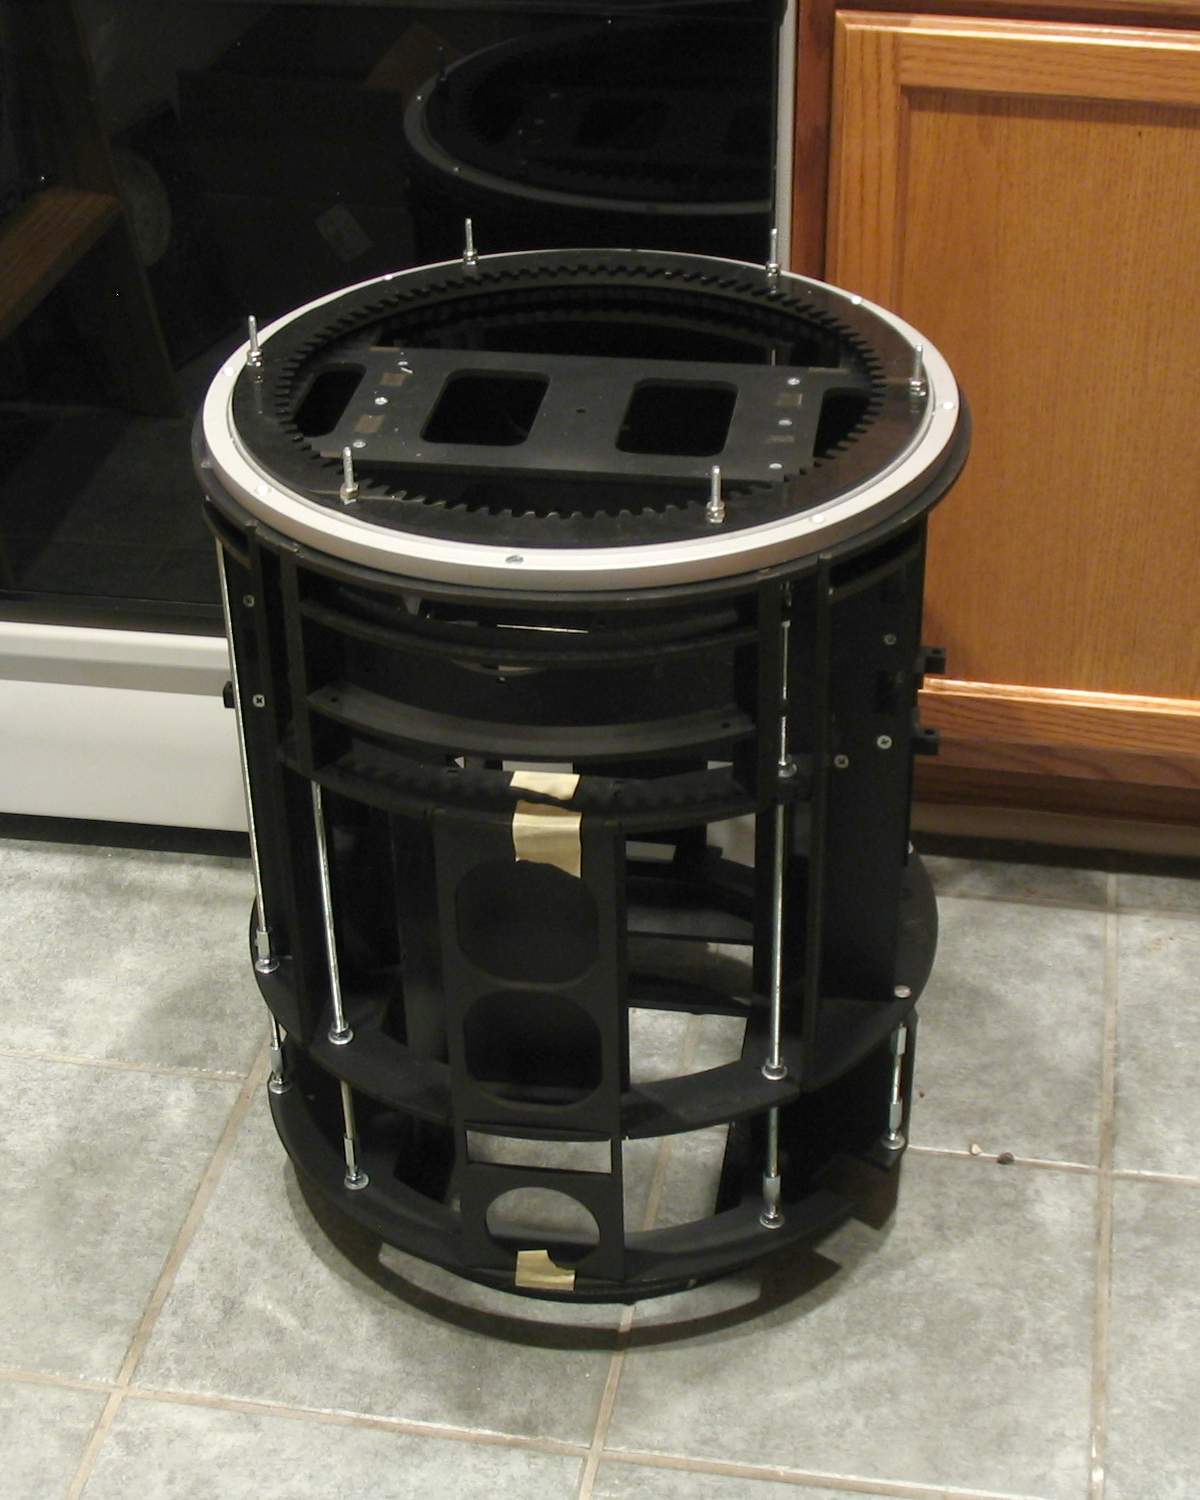
July 25, 2008
Some good progress to report!
Frame has been "glued and screwed", and the steel rods have been
installed. Rear access door frame is installed, but not adjusted yet.
Rockler bearing (lazy susan) is installed. The inner dome has had it's
lower rings attached, and so now it is mountable on the bearing. The
outer dome's panels have been removed in preparation for sanding,
filing, and painting. And the legs have some basic construction started.
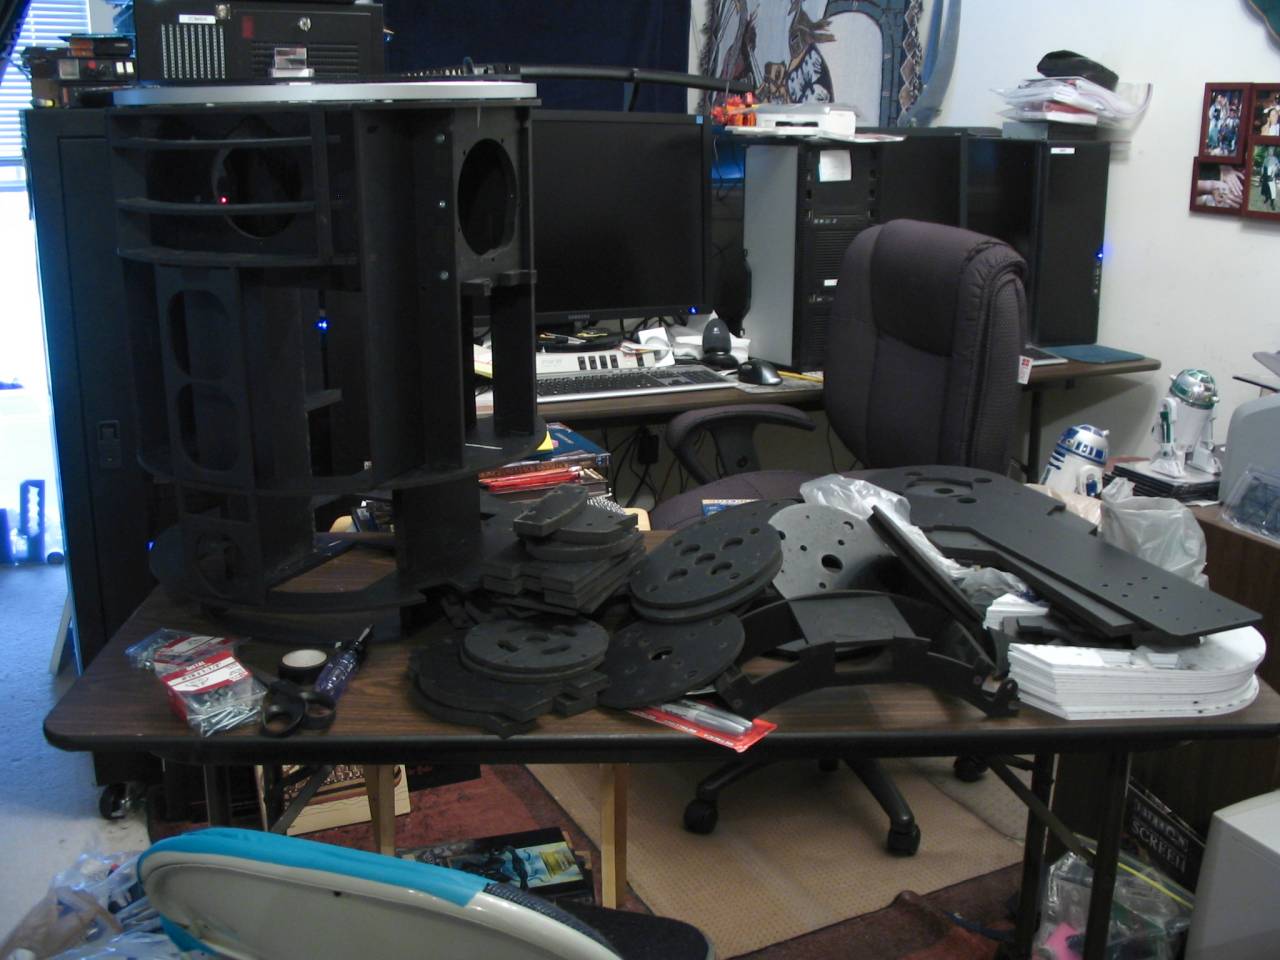
March 28, 2008
Progress is slow of course, but I'm getting minor things done. Many
of the plastic parts have been run through the dishwasher to get the
laser-cutting residue off, and I have parts and instruction sheets
spread out all over a small project table!
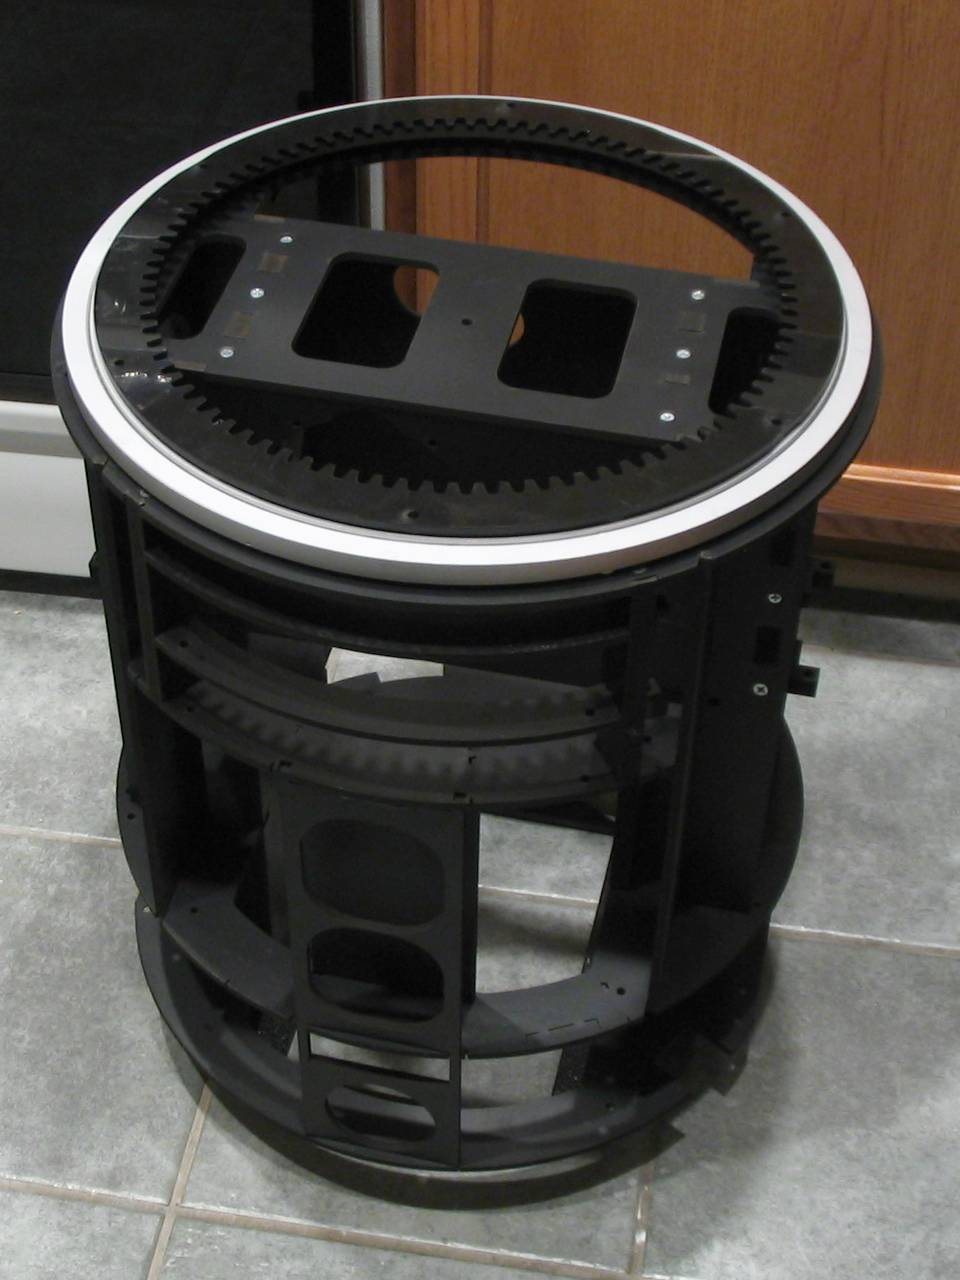
March 24, 2008
I was hoping to have the head pretty well put together by now, but I'm still
waiting on the dome kit. However, the local R2 builders group met on saturday,
and helped me get started on the frame. I spent some time tonight working on
screwing everything together. I still need to work on the threaded support rods
though. For the picture I just laid the rockler bearing and gear on top to
see where they will sit.
January 7, 2008
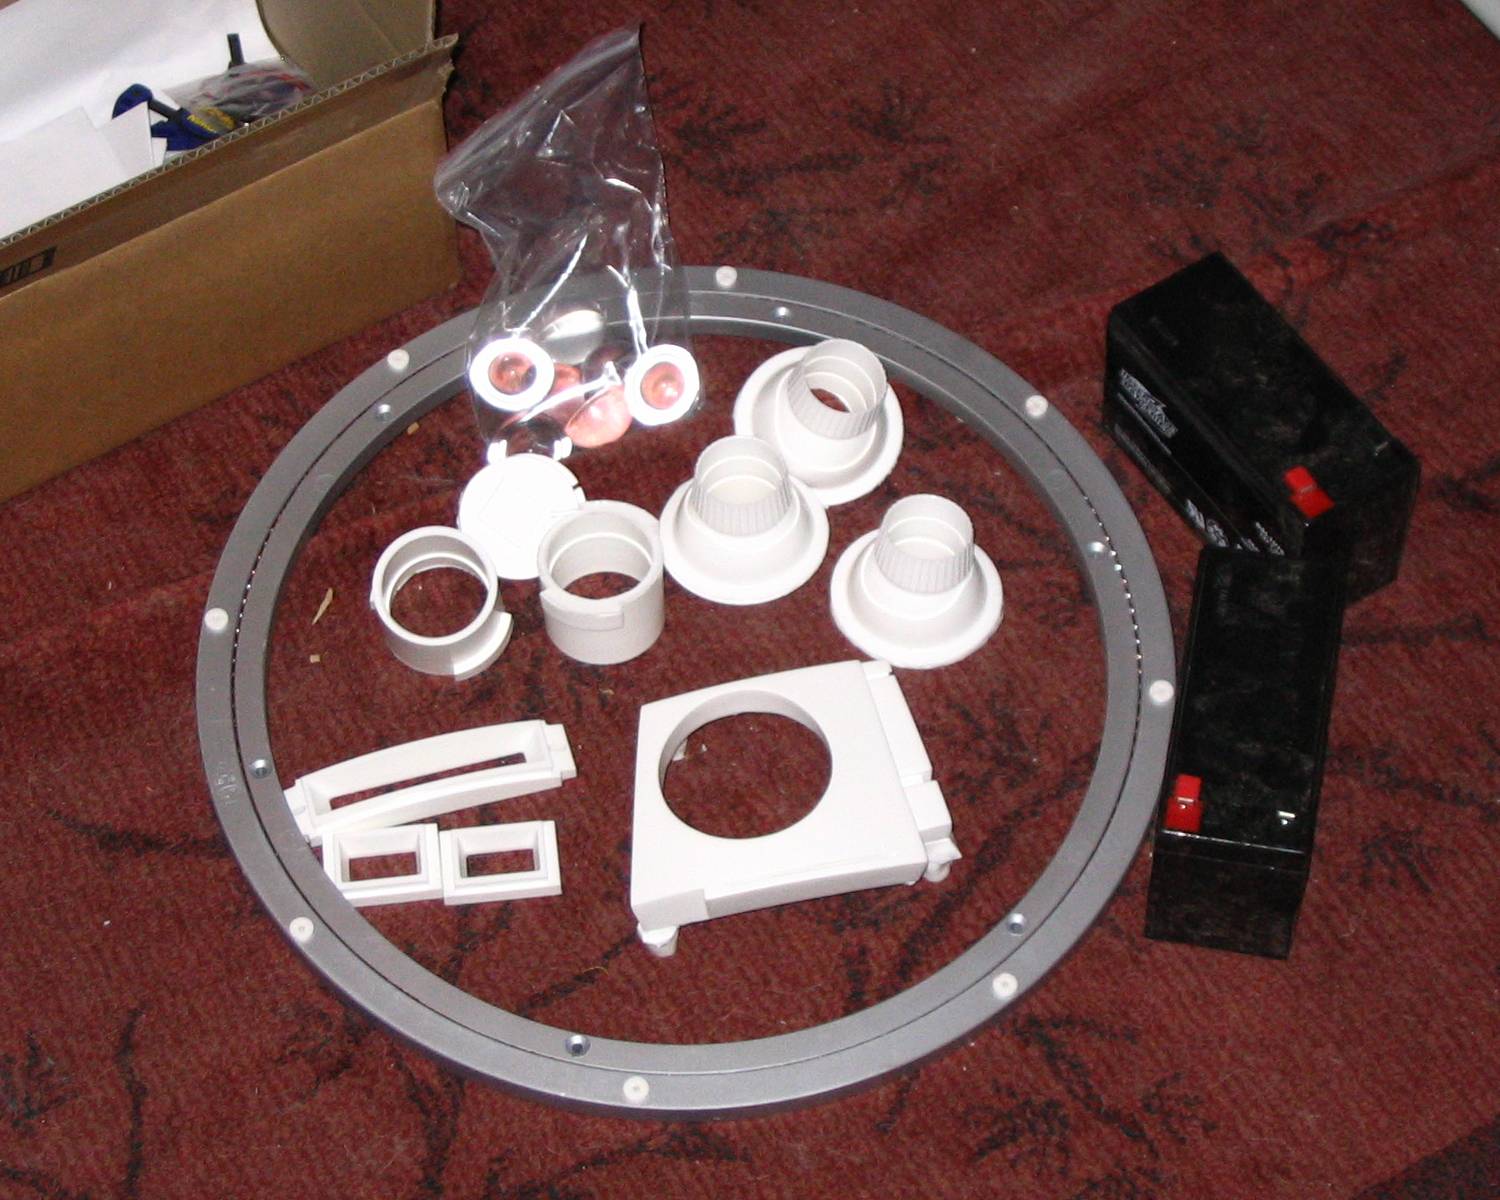
More parts are here, and more are coming! My batteries, lazy-susan, resin parts for
the head details, as well as the lenses for the holo-eyes have all arrived.
Now I'm also planning on getting the frame and leg kits that are
"council approved" and built to club specs. Also on the way are the battery
charger, and front and side vents.
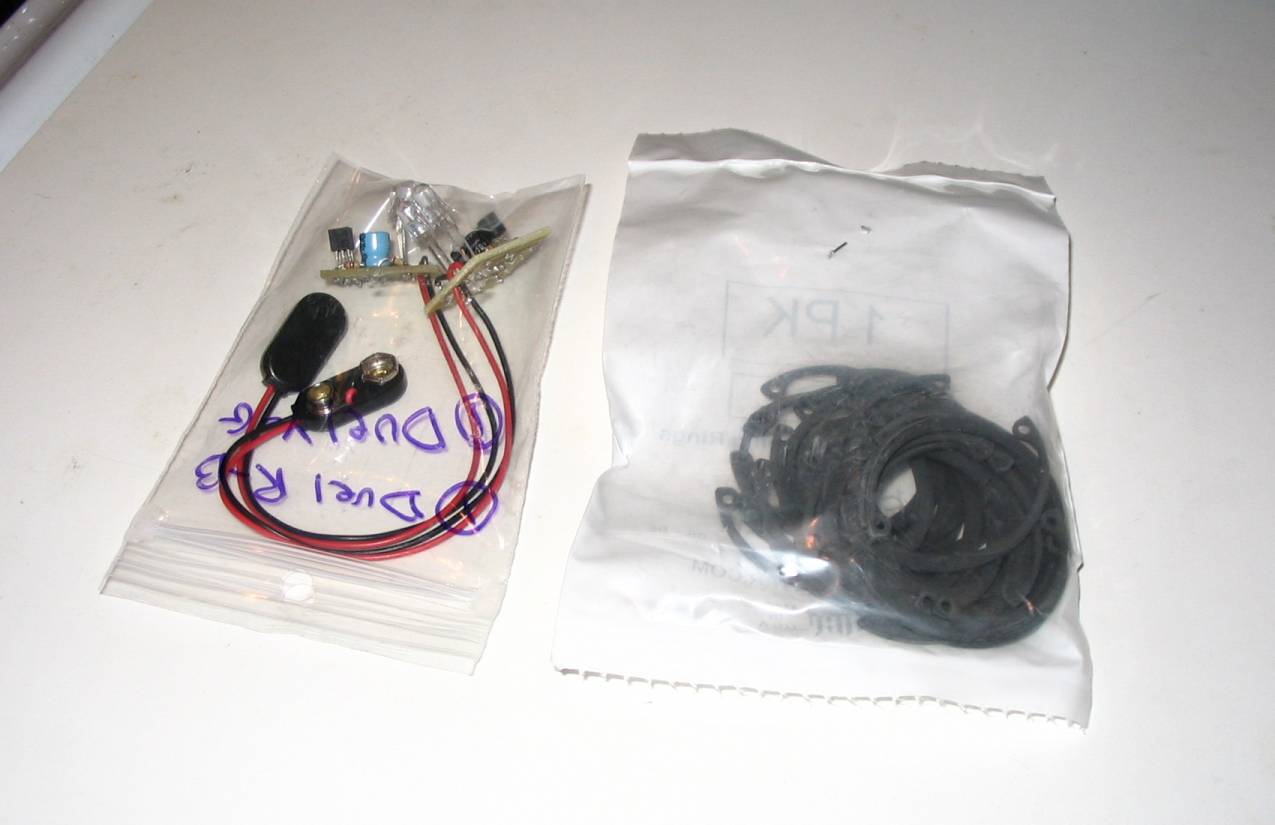
December 29, 2007
The first of the parts have made it here, though nothing spectacular
yet. I've received the compression rings to hold the lenses inside the
holo-eyes, and the PSI light LED flashers.
I've also located batteries, an external charger, and a power
distribution board, which are now all on order.
I think I'll name the droid R2-E0. The "E0" meaning it's Ed's
first droid. I'm a programmer/engineer. We count from zero.
I'm considering computer control and have been looking at
Mini-ITX boards, as well as various relay controllers.
The Phidgets devices look cool,
but I'm always nervous about closed architectures and complex APIs
when all I want is a simple serial interface that I can work with
from Perl in Linux. The devices over at
ControlAnything.com look more appealing in that regard, even though
they're more expensive. They're also more extensible.
December 22, 2007
R2-M0
"artoo em naught"
"are too, am not!"
Well, I finally decided to get started! My goal is to build
an R2-like droid, emulating the friendly little Astromechs featured
in the Star Wars films. After discovering that there are clubs devoted
to this thing, I decided I finally had a starting point.
My goal is to build the droid to have lights and sound, and hopefully
eventually also radio-controlled (R/C) motors. I'm also thinking about
an on-board computer to automate sound effects and possibly some of the
lights and movement as well. I'm not aiming for 100% authenticity, necessarily,
but I'd like it to be accurate where possible.
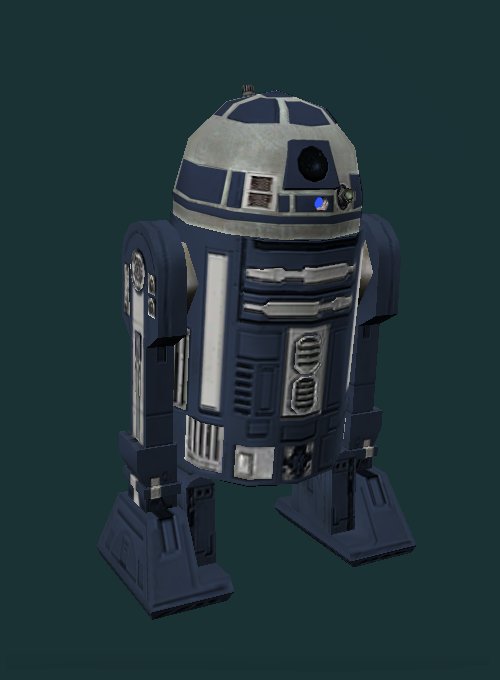
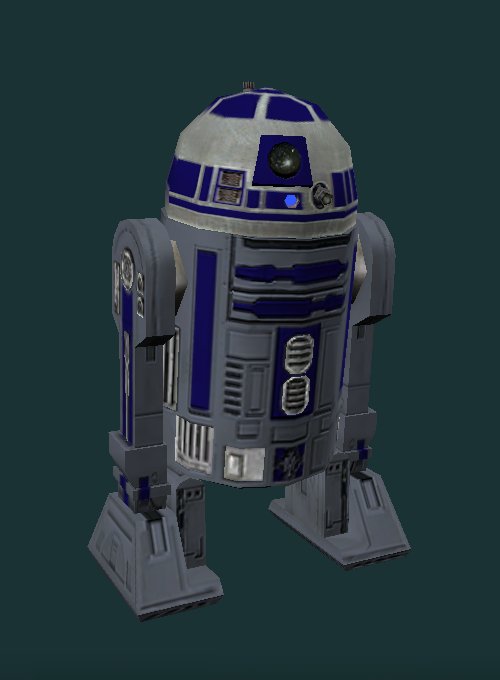
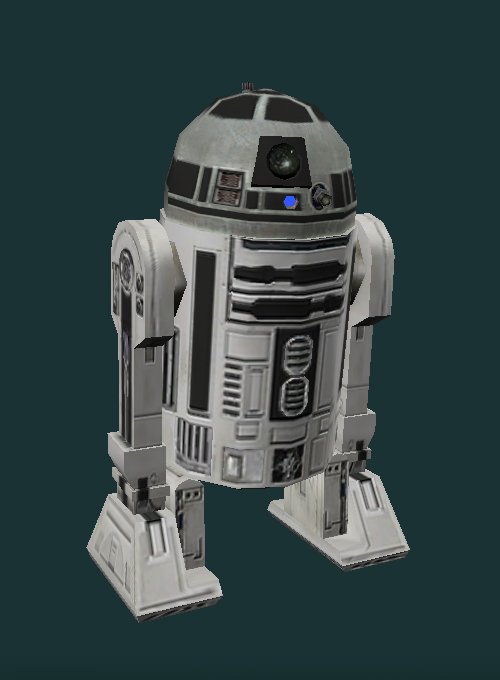
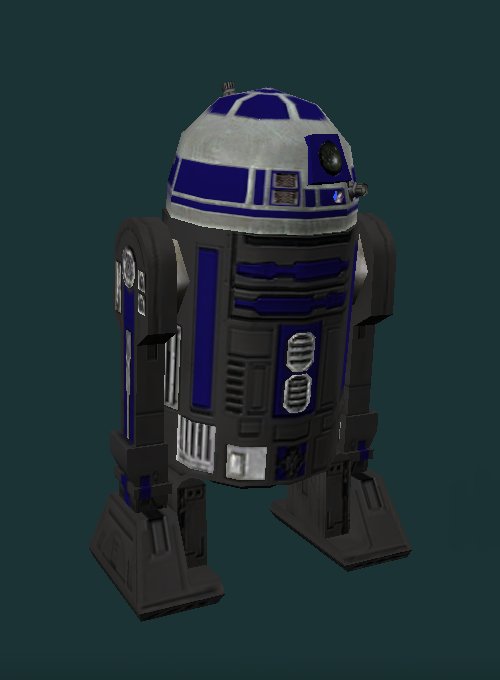
The computer-generated picture on the right is one of my concepts for colors and
style. This may change, of course. The image was created in Star Wars
Galaxies, and then edited to put the steel-blue on the dome details instead
of the white. Below are some more ideas which didn't require editing after
taking screenshots.
The working name for this droid, also subject to change, is R2-M0 ("Artoo Em Zero").
This is an inside joke, paying homage to one of the jokes in the Pink Five
fan films, in which during the Episode-V scene that had Luke shouting out "artoo!" to find R2-D2,
Pink Five's lead character is responding "am not!"... so the droid is
"are too, em naught!"
UPDATE- Crap! I googled around, and even though I came up with the
"artoo em naught" name myself, it's been done before! Grrr. Another idea I
had though was to call it R2-ET, just using my initials.
Also...
Parts ordered! It's a little dicey around the holidays of course, so not
all of these have been confirmed. But I have one of Daren Murrer's
laser-cut 300mm domes on order, from the r2-builders club. Also, some
resin details, such as the logic port, holo-eye, and other housings for
the head on order as well. Plus, the aluminum lazy-susan for the head
rotation, holo-eye lenses and retaining rings, and PSI light LEDs. My
goal is to hit the ground running and have a beautiful head in need of
a body. I'll need to locate suitable paints and adhesives, and I can
get started!
(1024x768 or better resolution is recommended for this site)